Zillow Housing Forecast Web Application
This was my first self-driven project dabbling in AWS. It’s a simple two-tier web application that allows the user to input a ZIP code and view Zillow’s predicted one year percent-change in housing costs for the given area. The back-end database resides on a LAMP web server running on an EC2 instance. The frontend is a Python Flask app hosted on Elastic Beanstalk. You can view my GitHub repo here.
LAMP Web Server Installation and Configuration
This particular web server uses Linux, Apache, MariaDB, and PHP. AWS provides a convenient automation document found here. The installation took no time at all. The configuration was another story. It took me a while to figure out the login credentials for PHP MyAdmin, but after reading the fine lines I discovered that the root password (which is randomized) was automatically stored within the Systems Manager Parameter Store. Since phpMyAdmin was not yet configured, any attempts to log in with the newfound credentials were met with an error.
I navigated through my EC2 instance using SSH and found /var/www/html/phpmyadmin. Inside the directory was a sample config file. I renamed the file and had to change the host value to 127.0.0.1. After an instance reboot, I was able to log in just fine.
Now using the phpMyAdmin interface, I imported Zillow’s home value forecast data into a new table in a new database. At this point I hadn’t yet decided how I was going to go about making the front-end of the web app, but I eventually found a neat tutorial on deploying a Flask application to Elastic Beanstalk.
Creating the Flask Application
I was experiencing some problems using the scripts provided by AWS to install the Elastic Beanstalk CLI, so I installed it manually as per these instructions: https://docs.aws.amazon.com/elasticbeanstalk/latest/dg/eb-cli3-install-windows.html
Then I created my project directory, virtual Flask environment, and requirements.txt to install the required libraries once EB deployed.
At this point I was able to run the sample Flask app provided by AWS. In my project directory, I navigated to virt/Scripts and ran the activate.bat file. This starts up the virtual Flask environment in a new cmd prompt window. Then, in the new window, I navigated to the base directory of my project and ran my python file with the command “python application.py”. Here’s what that looked like: 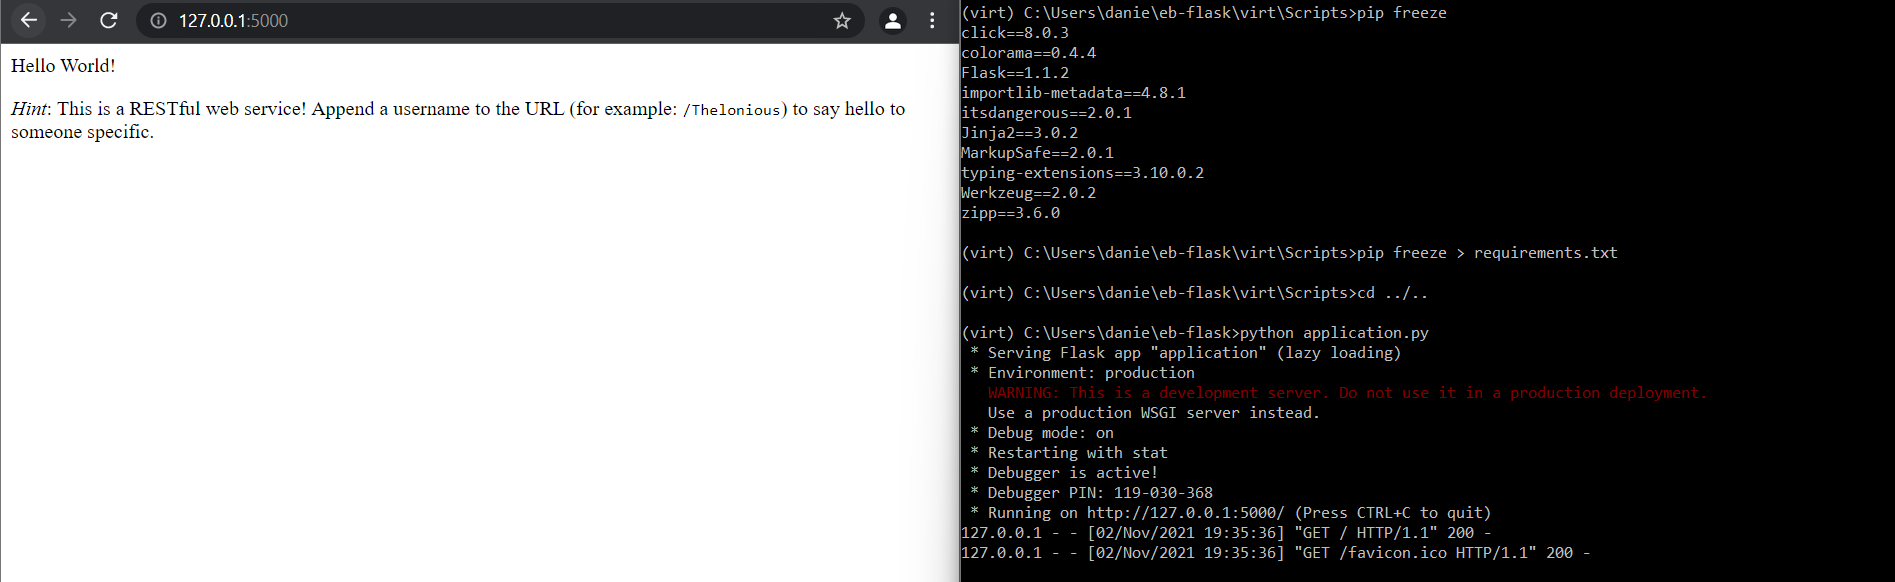
I wrote some basic HTML and added an index page to the templates folder of my project. I then needed to figure out how to connect the application to my back-end database. This resource pointed me in the right direction.
Connecting the Flask App to the Back-end Database
As I was researching how to connect to my database, I came across something significant. The PHPMyAdmin client was connecting to 127.0.0.1, which meant that it wouldn’t be listening on the external IP address. To my understanding, having the database listen on the external IP usually isn’t practical in a real-world setting for various security and reliability reasons, but since this web app isn’t intended to go public, I decided to go ahead and change the configuration.
To do this, I used this source which was invaluable to say the least. I connected to my EC2 instance command line and was able to find the config file in /etc/my.cnf.d and set the bind-address to 0.0.0.0. This allowed the database to listen on all IPv4 interfaces. Here’s a picture of that: 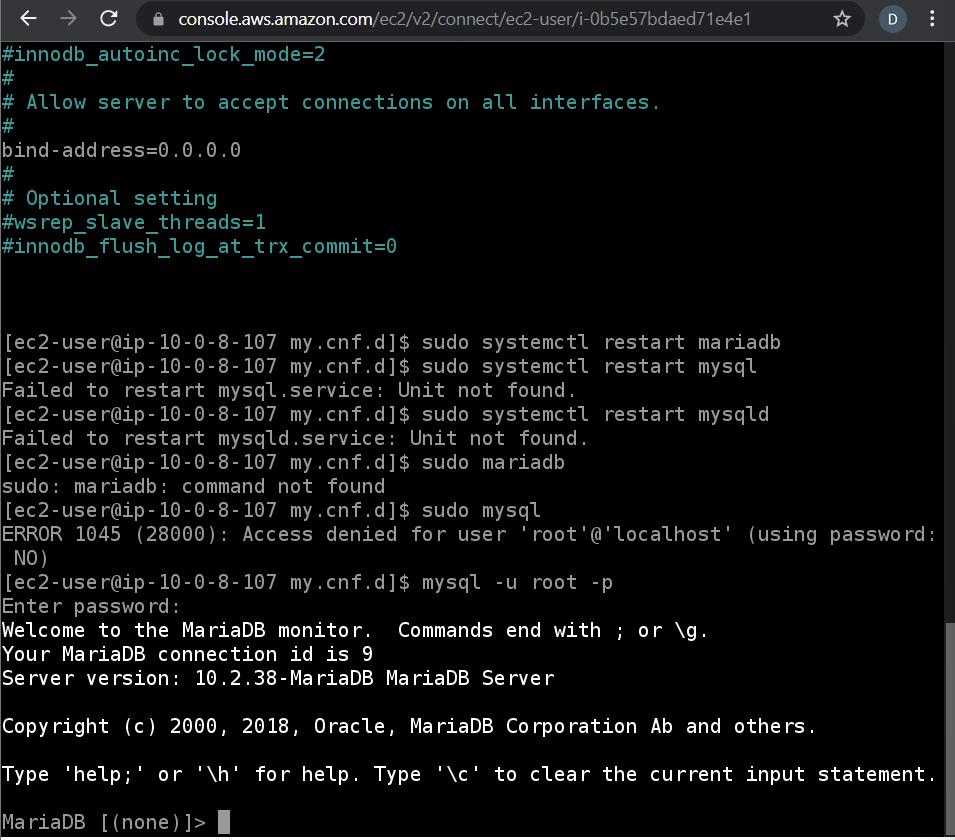
Then I created a user to access the database and granted remote access to it. I also configured the iptables firewall to allow access to the MySQL port 3306. The command for this is “sudo iptables -A INPUT -p tcp –destination-port 3306 -j ACCEPT”. I then tried to log in to the database using my new credentials but I got an error. I was pretty confused at this point. I had opened the correct port and configured the server to listen on the external IP address… I got so caught up in the command line trying to find the solution, but I had never thought to configure the security group of my EC2 instance. So I edited the inbound rules to accept port 3306 and successfully logged into the database remotely.
Heading back to my Flask application, I updated the connection credentials and everything seemed to be running smoothly at that point. I verified that Flask was able to successfully connect to my database by making use of this resource. The next step was figuring out how to create a user input box on the index page pass the value into python as a variable. I would then be able to perform SQL queries using that user input.
Querying the Database From the Web App User Interface
This resource was incredibly helpful. First I wrote some code that included a simple query, just to verify that I could query the database successfully: 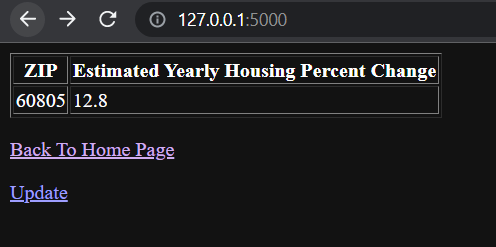
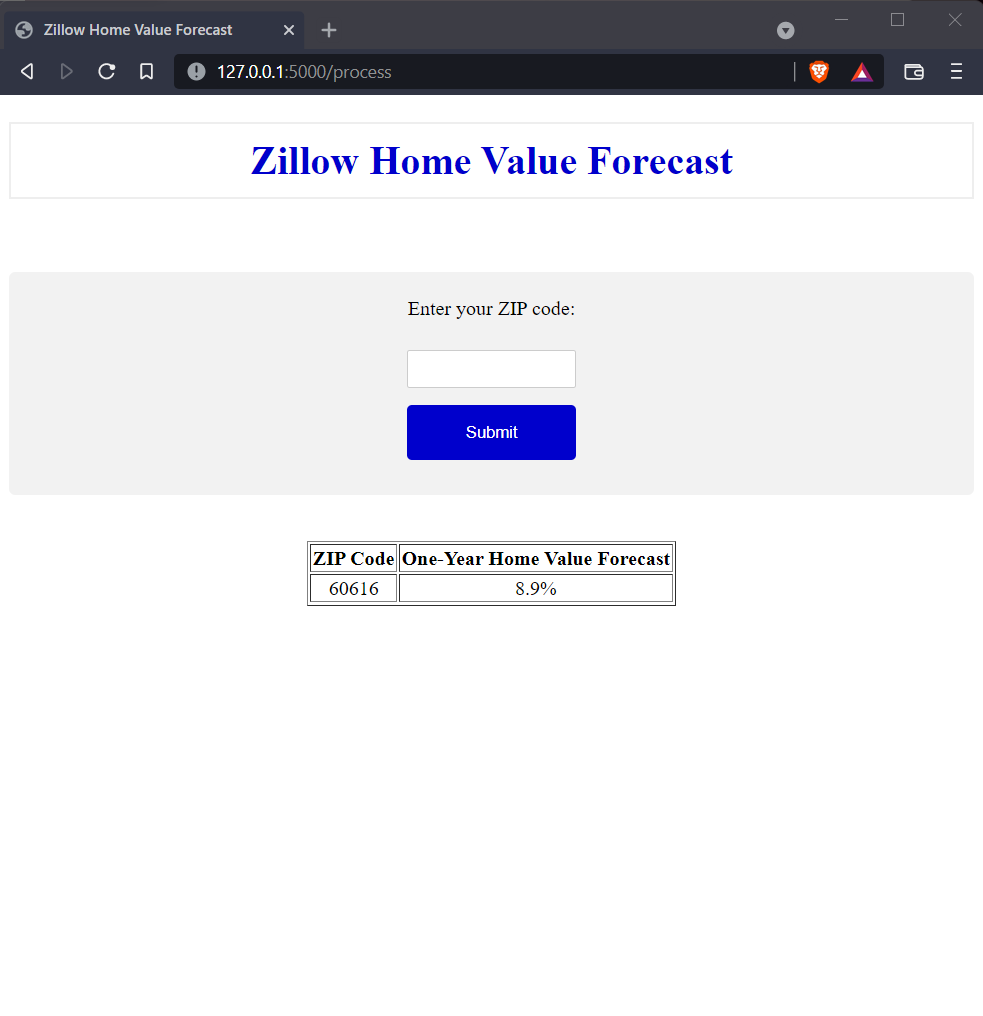
You can see I was able to query by ZIP code and return the predicted one-year percent-change in housing costs for the given ZIP code. Figuring out how to do this with the user input was quite the task, but I eventually did it. Here’s the final product: 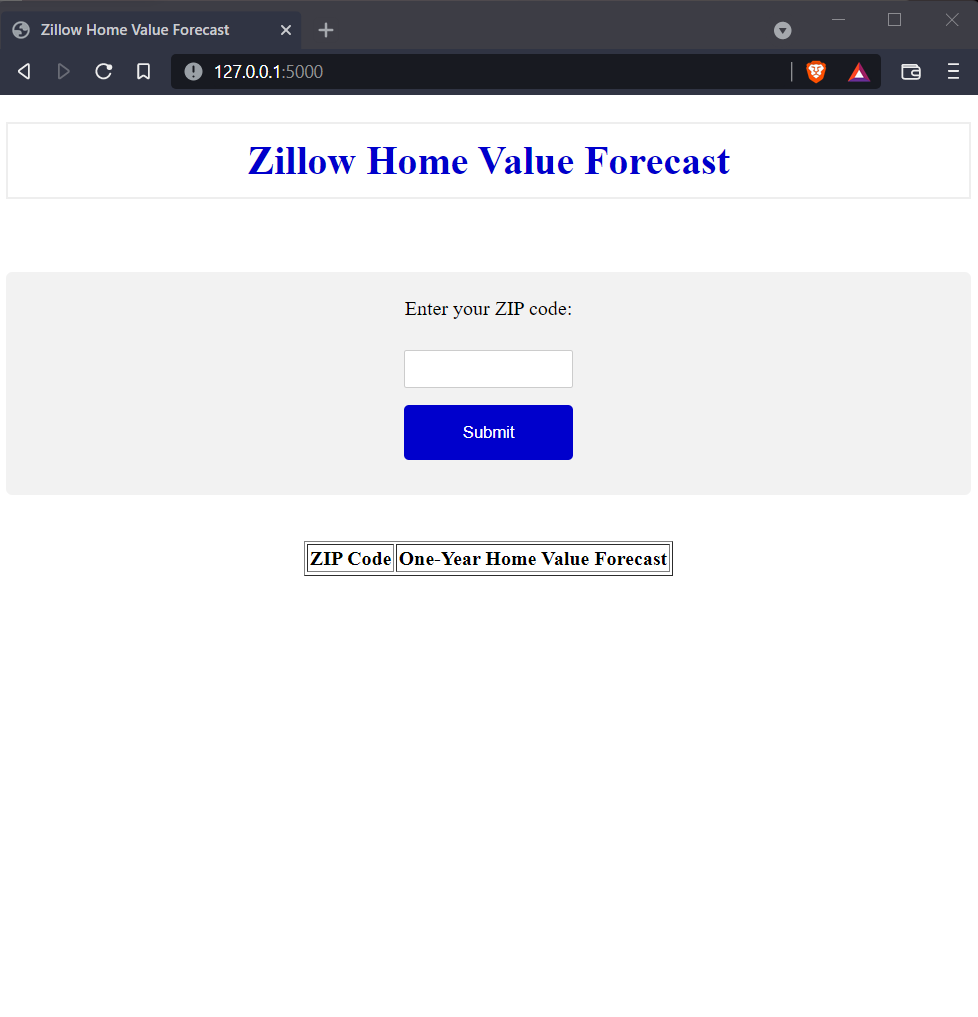
Finally, I created an Elastic Beanstalk repository following the aforementioned article here. AWS will automate the hosting of your Flask application at the drop of a dime, creating an EC2 instance, security group, load balancer, auto scaling group, S3 bucket, two CloudWatch alarms, a CloudFormation stack, and of course a domain name. Fancy stuff.
Final Thoughts
I’m pretty happy with how this project turned out. It achieved its goal of letting the user find housing forecast data in a matter of seconds, without the added hassle of having to download a whole .csv file and sorting through it. This was my first attempt at building a web app without any direction. It was also my first time using Flask. I was a bit rusty with python and HTML, so this was a good refresher, especially with all of the obstacles I encountered.
Now that I have the fundamentals down with a project like this, I feel confident that I could expand on it. I’m sure I would be able to do things like add more datasets or go more in depth with queries. Maybe I will some time in the future.